
No matter what diving style you prefer, equalizing is a crucial technique all divers must learn. If you have ever descended underwater for any length of time, you have likely felt the effect of pressure on your ears. This pressure can be very uncomfortable and even painful at times.
As a freediver, you need to be able to equalize your ears effectively. While some techniques used by scuba divers may work, options as freedivers are limited due to holding their breath. When coupled with the fact many freedivers will be head-down while diving, this can make equalizing even more difficult. This requires mastery of freediving equalizing techniques.
Equalizing for freediving is a skill you should take the time to develop. In this article, we will discuss how to do equalizing right, allowing you to dive deeper and for longer.
Table of Contents
What Is Equalization?
Equalization is the process of balancing the pressure between your middle ear and the outside environment. Human ears can adjust to different pressure levels, but sometimes they need a little help. As we ascend or descend while in a pressurized environment, like an airplane, our ears must compensate – which is why our ears sometimes ‘pop’ during a flight.
When freediving, the same concept applies – as you descend deeper, the pressure increases and can become uncomfortable. However, as our ears are not used to an underwater environment, they often cannot adjust naturally. This effect is known as hydrostatic pressure and is due to the amount of water pushing down from above.
When freediving, the pressure difference between your middle ear and the surrounding environment increases an additional atmosphere (ATM) for every 33 ft of depth. This added pressure can cause severe damage, so freedivers need to equalize often during a dive.
The Importance of Equalizing for Freedivers
While we know what equalization is, why is freediving equalizing so important? When the pressure from diving builds up in your ears, it can cause permanent damage if not relieved. Known as barotrauma, damage to your middle ear is a risk freedivers should take seriously.
Within our bodies are two different types of air spaces: dynamic and static. As we dive deeper underwater, these airspaces become compressed. As the volume of air in these spaces decreases and the water pressure increases, introflection or ‘flexing’ of the eardrum will occur. This feeling is often described as a ‘squeeze’ in your ear and is a sign of equalization being required.
Scientifically this can be explained as follows: Boyle’s law states that the pressure of a confined gas is inversely proportional to its volume. This means that as our ears descend, the air volume within them will decrease, as pressure increases.
In freediving, equalizing is key to relieving pressure and reducing risks of injury or damage. By balancing your ears, you can reduce the risk of barotrauma and freedive comfortably, even at the deepest depths.
Equalizing Air Spaces: Dynamic and Static
Any freediver will have heard of dynamic and static breathing during their freediving training. If you’re unfamiliar with these terms, don’t worry! Essentially, all dynamic means is that there is movement involved, while static implies no action at all. For example, one common freediving breathing exercise and discipline is static apnea. Static apnea is the practice of holding your breath in a stationary position – with no movements. See here for our guide on freediving breathing techniques and exercises.
In terms of air spaces, dynamic refers to air spaces that can move or expand, and static refers to air spaces that are ‘fixed.’ Understanding these two types of airspaces is essential as it gives a clear picture of what happens when we equalize. Your lungs, stomach, and the air spaces in your mouth are all dynamic. In comparison, your middle ear, mask, and the air spaces in your nose and sinuses are static.
When freediving, you will often use the dynamic air spaces to pass air through to your static air spaces, equalizing the pressure. Understanding this information and the anatomy of equalization is the key to equalizing correctly while freediving.
Understanding Equalization Anatomy
Having an awareness of the anatomy involved in equalization helps us freedive safely and correctly. Our bodies are made up of many moving parts. While there are various air spaces involved during equalization, they are each connected in one way or another.
Let’s look at some of the essential anatomies involved in freediving equalization:
Eustachian Tube
This tube connects the middle ear to the back of our nose and throat. The Eustachian tube works to drain fluid and maintain equal pressure between the inner ear and the outside environment.
Nasopharynx
This is the upper area directly behind our nose, located in the back of our throat. The nasopharynx allows air to travel from your nose to your lungs.
Middle Ear
The middle ear contains three tiny bones: the malleus, incus, and stapes. These bones aid in equalizing the pressure between your inner ear and the surrounding environment.
Epiglottis
The epiglottis is a flap that rests at the base of your tongue and prevents food or drink from entering your lungs.
Glottis
The glottis is the opening at the base of your vocal cords. It is vital for allowing airflow into and out of our lungs.
Soft Palette
The soft palette is positioned above your epiglottis at the back of your mouth. Some functions of the soft palette involve swallowing and allowing you to produce sound. The soft palette plays a vital role when freediving equalizing, as its positioning helps direct air to the Eustachian tube.
Freediving Equalizing Techniques
There are a huge range of equalizing methods used by divers. Some are best suited to scuba diving, where you have more time and space to equalize. Other methods are specifically designed for freediving, so you can equalize quickly and efficiently.
With the above information in mind, let’s look at some freediving equalizing techniques.
The Valsalva Maneuver
The Valsalva maneuver is a popular equalizing technique often used by scuba divers. During the Valsalva technique, your glottis and soft palette are open – just as they would be when you are breathing. This method is also commonly used among beginner freedivers as it is one of the easiest ways to equalize.
But while it is simple, it is not the best freediving equalizing technique. The reason for this is it requires you to blow air from your lungs to your nose, which you have pinched shut. When freediving, your breath is precious, and you should be careful not to waste it.
Another reason why the Valsalva isn’t ideal for most freedivers is it loses its effectiveness the deeper you dive. As the main goal for most freedivers is to dive as deep as possible, they likely need an equalizing method that remains effective at greater depths. When a diver descends deeper than 10m, their lung capacity decreases, meaning they likely can’t blow out enough air from their lungs to equalize successfully.
While the Valsalva isn’t the favored freediving equalizing technique, it is still helpful to understand and practice. Here is how to do the Valsalva maneuver:
- Take your thumb and index finger and press them firmly against your nostrils.
- Keep your mouth closed
- Contract your stomach muscles and bear down
- While doing the above, breathe out your pinched nostrils
- You should feel a popping sensation in your ears, indicating equalization has occurred
If the Valsalva maneuver does not work, you are either too deep, or your Eustachian tubes are blocked. If your Eustachian tubes are blocked, you should try to clear them by doing the Frenzel maneuver. If you are head down, you should try to equalize in a head-up position.
The Frenzel Maneuver
The Frenzel is by far the most popular freediving equalizing technique, as it can be used effectively at depth. During this equalizing method, your glottis is shut over, stopping the airflow from your lungs, and your soft palette is raised, which directs the airflow up to your Eustachian tubes.
The Frenzel is a bit more complicated than the Valsalva, but it becomes easy to do once you understand it. Here is how to do the Frenzel maneuver:
- Take your thumb and index finger and press them firmly against your nostrils
- Keep your mouth closed and relax your throat
- Contract the back of your tongue against the roof of your mouth as if you were saying the letter “K.” This movement will push air from your throat up to your Eustachian tubes
- You should feel a popping sensation in your ears, which indicates that equalization has occurred
VTO Hands-Free Maneuver
The Voluntary Tubal Opening (VTO), also known as the Béance Tubaire Volontaire (BTV), is one of the most challenging freediving equalization methods. While the VTO is excellent at releasing pressure, few people can master it. If you want to learn the VTO, it will take a lot of practice and patience.
For guidance, here is how to perform the VTO hands-free maneuver:
- Contract the muscles surrounding your Eustachian tubes
- Close your throat and open your soft palette
- Put the tip of your tongue to the back of your front teeth
- Shift the air above your tongue to the back of your throat and then up
- If successful, you should feel a popping sensation in your ears
As with any freediving equalizing technique, you must first practice the VTO maneuver on dry land.
The Mouth-fill Technique
At some point during your dive, other equalizing techniques may not work, especially when you are freediving deep. In these cases, you will need to use the mouth-fill technique. As the residual volume of air left in your lungs is much smaller at depth, you can fill your cheeks with air and use it as an ‘air reserve.’
Here is how to do the mouth-fill technique:
- Before reaching residual volume (around 20-30m), fill your cheeks with some air
- Pinch your nose closed with your thumb and index finger
- Keep your epiglottis closed and soft palette open
- Slowly compress the air in your mouth by closing your jaw and using your tongue
- This will push the air up to your Eustachian tubes, equalizing the pressure
Mask Equalization
When freediving, it isn’t just the air in your body that needs equalizing. You must also equalize your freediving mask to relieve any pressure. It is important to wear a low-volume freediving mask, as that will require less air to equalize. Some freedivers even wear special goggles filled with liquid as they do not need equalizing.
All you need to do to equalize your mask is to blow a little air through your nose and into your mask. This is help equalize any built-up pressure and reduce any potential discomfort. Remember, as your breath is limited when freediving, you should only do this as necessary.
8 Tips for Freediving Equalization
Freediving equalization is more than just the techniques used. Just like before you freedive, you must prepare your body properly. Here are some tips to keep in mind regarding equalizing for freedivers:
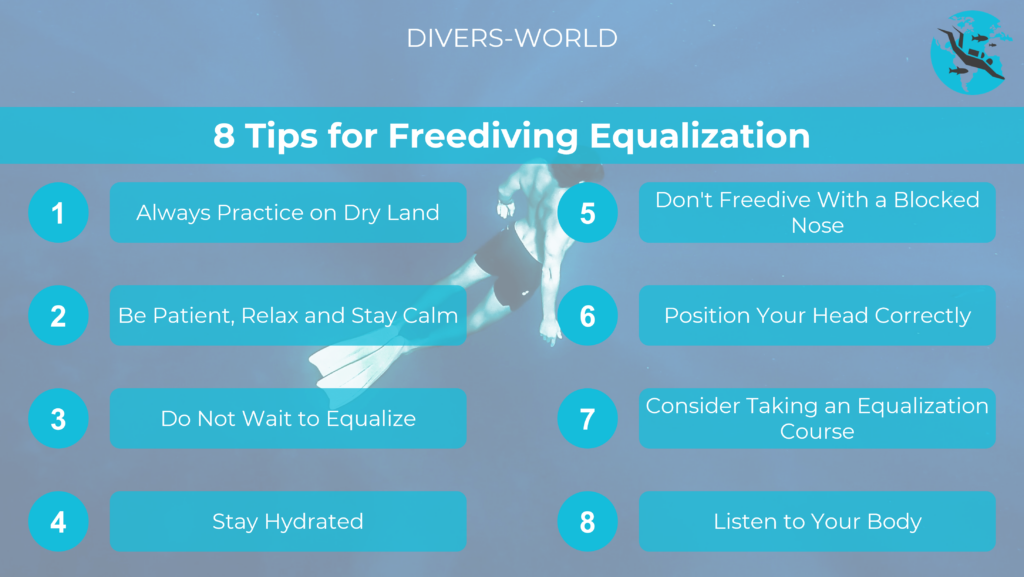
1. Always Practice on Dry Land
Practice freediving equalization on dry land before going into the water. This will help ensure you can do it effortlessly once you are freediving. The more you practice will also help increase your muscle memory, making equalizing easier and faster. You can also purchase freediving equalization training devices, which usually involve blowing air from your nose into a nosepiece and small balloon.
When practicing, focus on what your body feels like when you equalize. Build awareness around how your soft palette feels when it is raised and how it feels when the air rushes up through your throat and into your ears. You should also open and close your glottis, so you can become familiar with the sensation.
Practicing equalizing goes hand in hand with practicing breathing techniques – check out our guide.
2. Be Patient, Relax and Stay Calm
It can be frustrating if you cannot equalize when freediving. The key is to stay relaxed and take your time. If you cannot equalize for whatever reason, ascend slowly to the surface. As you get closer to the water’s surface, the pressure will decrease, meaning your ears will likely automatically equalize. Be sure to never freedive beyond your limits.
3. Do Not Wait to Equalize
Equalize frequently while freediving to help avoid any pain or discomfort – especially at the beginning of a dive. While you may want to save your breath and energy, equalizing should not be delayed. The longer you wait to equalize, the higher the chances of getting discomfort or an injury in your ears and sinuses.
4. Stay Hydrated
Dehydration makes freediving equalization much harder, so ensure you stay hydrated. If you are not hydrated, the mucus in your sinuses can become sticky – which makes it harder to equalize.
5. Don’t Freedive With a Blocked Nose
If you have a cold or allergies, it can cause your nose to become blocked. When your nose is blocked, it limits the air available to equalize, so freediving with a blocked nose can be dangerous.
Make sure your nasal passages are clear before freediving, and always start with shallow freedivers until you can easily equalize. Many freedivers like to use a sinus rinse before freediving, like a Neti pot, to help clear out their nasal passages.
6. Position Your Head Correctly
Descending is when you will need to equalize, so ensure your head is in the correct position. While you can’t change the fact that your head is down, you can keep your spine straight (not looking up or down) to help when equalizing.
Please note equalizing when head down will be difficult at first. The reason for this is when we are upside down, our soft palette will automatically close. This is why it is essential to practice our freediving equalizing on land and familiarize the muscles and reflexes required.
7. Consider Taking an Equalization Course
For some people, equalization comes naturally. But, for others, it can really put a damper on freediving. If you are having difficulty equalizing, consider taking a freediving equalization course. A professional freediver instructor will help to guide and coach you through the freediving equalization process.
8. Listen to Your Body
Finally, always listen to your body when freediving and be mindful of how it feels. Do not push your body beyond its limits, as this can be dangerous. If you struggle to equalize or feel discomfort, it is time to ascend back up.
If at any time you feel any pain, dizziness, or disorientation, immediately surface and seek professional medical advice.
Final Thoughts on Equalizing for Freedivers
It is clear how important freediving equalization is for freedivers, as it plays a key role in freediving safety. If you want to be able to dive deeper and freedive for longer, then it’s essential to get comfortable with the equalization process.
By practicing some freediving equalization techniques on land, drinking plenty of water, and being aware of your body’s limits, you can freedive confidently. And don’t forget, what works for one diver may not work for you – there is no one size fits all approach!